Now, there is something else very easy but very useful we can do: we can add a badge or a button that says Open in Streamlit in our GitHub repository. By doing this, everyone can directly access our deployed web app very easily just by clicking this badge.
This operation is quite immediate since we just have to add a README.md file with a couple of lines of code to our repository.
So, let’s add the README.md file containing the code shown in the following screenshot to our GitHub repository:

Figure 7.13: The README.md file’s content
The first URL, so the first https://, is the link to the badge or the image, while the second one, so the second https://, is just the URL of the web app you just deployed, so please customize it with your app’s real URL.
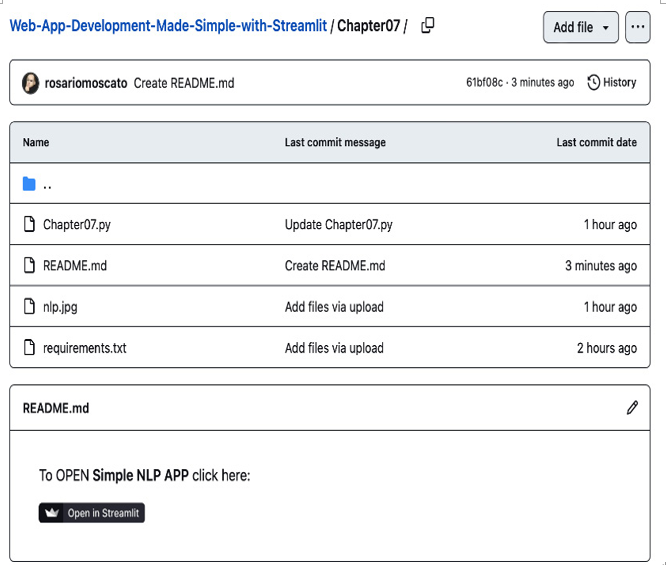
The following figure shows us the effect in the GitHub repository:

Figure 7.14: The “Open in Streamlit” badge
As we mentioned previously, upon clicking on the badge, you will be redirected to the web application we just deployed.
Before closing this chapter, please note that when we developed our NLP application after installing all the required Python packages, we downloaded the spaCy English model with the following command:
python -m spacy download en_core_web_sm
When we deploy an app on Streamlit Share, we just have a requirements.txt file. So, how do we get our spaCy English model?
If we get an error related to NOT FOUND en_core_web_sm, to fix it, we have to make a very easy change in our requirements.txt file – we have just to replace the line related to spacy with the following two lines:
spacy>=2.2.0,<3.0.0
https://github.com/explosion/spacy-models/releases/download/en_core_web_sm-2.2.0/en_core_web_sm-2.2.0.tar.gz#egg=en_core_web_sm
In this way, the English model will be downloaded to our workspace and everything will work perfectly!
If we stop for a few seconds and think carefully, we’ll understand that in this section, we achieved an incredible result. A web app that was previously living only in our little environment (our computer or our local network) is now available for anyone who has an internet connection. Anyone everywhere can interact with our web application and use it. This kind of skill is incredibly valuable. We can not only develop beautiful web apps but also make them available to anybody. Our applications can now serve an incredibly wide audience.
Summary
Congratulations! You deployed your first web application, and now, anybody can access it and enjoy it just by using the URL you specified!
If you look back now, you can consider how far we’ve come together. Starting from a real empty file in an empty folder, we have built up a complete web application with a lot of features.
The point is that this new web application only lives in the developer’s computer or private network unless it’s deployed to the cloud.
Deploying it to the cloud is what we learned to do in this chapter. App deployment is the real “big thing” since we can make our creations accessible anywhere!
Making changes and improvements to what we have already deployed is very easy since we can simply modify the code according to the new ideas, test it, and upload it to the GitHub repository. After that, in a very magical way, Streamlit Share will automatically update the deployment seamlessly.
We can upload the code on GitHub and Streamlit Share takes care of all the rest: easy!
Starting with the next chapter, we are going to implement a new web application that’s even more complex than the one we’ve just finished. By doing this, we will learn about and master all the main advanced features of Streamlit!
