
Note
Studying the several Python packages we are importing and using is outside the scope of this book; however, having a look at the cv2 (OpenCV) official website https://opencv.org/) can be a very interesting activity.
After converting the uploaded image, we are ready to write some text on the screen (“Chest X-Ray”) to give our operation some context and print the black and white image:
st.text(“Chest X-Ray”)
st.image(gray, width=400, use_column_width= True)
Here’s the code we’ve added so far:

Figure 10.3: The code we’ve added to the Diagnosis menu
From the browser’s point of view, you should get something like this:
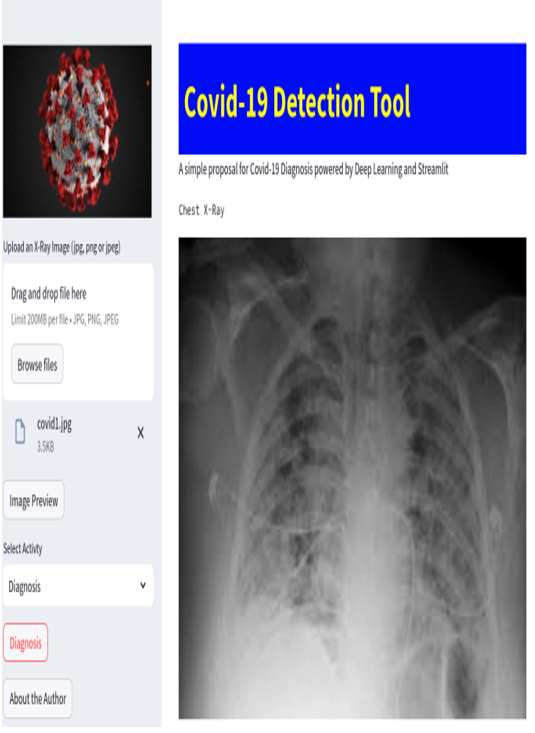
Figure 10.4: The Diagnosis button and the black and white image
Since the CNN was trained with black and white images in a specific format in terms of size and values, before performing the prediction, we must pre-process the image we are interested in to get the same format that the neural network is expecting.
The neural network was trained with images that had a size of 200 pixels by 200 pixels and their values went from 0 up to 1, where 0 was black and 1 was white.
The code we need to write to make sure the image we uploaded will be in the format needed by the neural network is as follows:
IMG_SIZE = (200, 200)
img = cv2.equalizeHist(gray)
img = cv2.resize(img, IMG_SIZE)
img = img/255 #normalization
The first line is just an image size definition that is saved in a constant. The second line performs image equalization, an operation that potentially increases the clarity of our image. The third line resizes the image according to the IMG_SIZE dimension saved in the constant, and the final instruction normalizes the image (usually, the values of gray tones go from 0 (black) to 255 (white); dividing everything by 255, we have values from 0 to 1, which are black and white, respectively).
Figure 10.5 shows the lines of code we just explained:
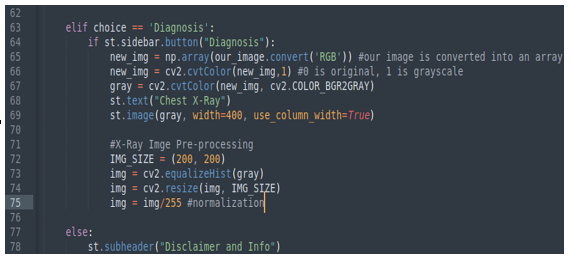
Figure 10.5: Pre-processing the X-ray image
The library we are using to manage neural networks is named tensorflow and it requires the images in a precise format (n,m,p,q), where n, m, p, and q are integers. Unfortunately, the shape of our image is only (200,200). So, before we use it for prediction, we must resize it; this is the instruction we should use:
X_Ray = img.reshape(1, 200, 200, 1)
By processing the image in this way, we have a very good input for ML classifiers. We’ll learn how to deal with this task in the next section.