
Creating a GitHub repository
Let’s log into GitHub with the same account we will be using later on to connect to Streamlit Cloud.
Once on GitHub, we can create a new repository by following these steps:
- Click on the New tab on the Repositories page. We should see the following screen:
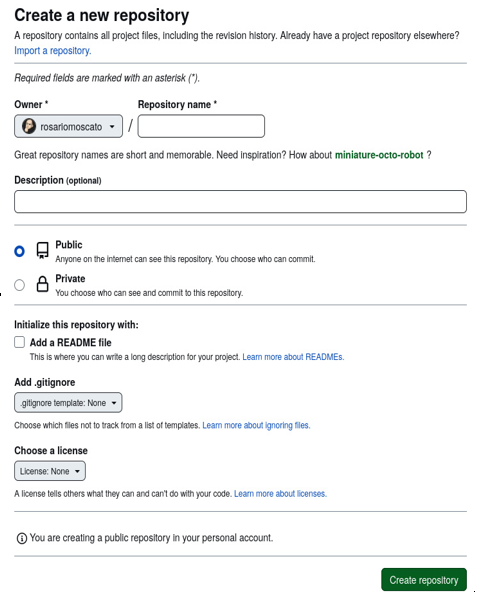
Figure 11.4: Creating a new repository on GitHub
- Insert a repository name, such as covid19-book, and add a description (this is not necessary).
- Keep the repository public and check Add a README file.
- Finally, click Create repository.
After a little while, we’ll get the following page:

Figure 11.5: The new repository is empty
As we can see, the new repository is empty. We must add the Python file and the requirements.txt file to it. This operation is very easy – we just need to click Add file and upload the files of our interest.
In principle, we are ready to go to Streamlit Cloud to deploy the application and share it with the world.
However, every time we are at this stage of the deployment process, we must pay great attention to our actions. If we try to deploy the files contained in the newly created repository to Streamlit Cloud, we’ll get a runtime error and the application won’t run. Let’s learn how to fix that.
Avoiding runtime errors
To avoid runtime errors during deployment, we have to think about what our web application needs to run properly.
The first item we need is the Covid-19 image that we display in the left sidebar of our Covid-19 Detection Tool app. This operation is very easy since we just have to add the covid19.jpeg file to our repository.
The second point of attention is that the Streamlit version available at the time of writing this book has some problems with the opencv library: there are issues when it attempts to import this library. To avoid this issue, we must create a new file in the repository by clicking Add file, and then selecting Create new file. We must call this file packages.txt. This new file must contain the following instruction:
libgl1
In this way, all the right dependencies will be installed by Streamlit Cloud at deployment time.
The third item we must pay extra attention to when using the Covid-19 Detection Tool app is as follows. When we upload the X-ray image and click on Diagnosis to determine whether or not it represents a case of Covid-19, the pretrained CNN model is run. If the web application is unable to locate the model, we may encounter issues.
The point of attention here is that uploading the AI model file is not enough because if we double-check the code we wrote on line 81, we’ll see that this model must be put inside a directory named models, living at the same level as the app.py file. In short, we must recreate the same files and directory order indicated in our Python code in our GitHub repository; otherwise, the files we need – specifically the CNN model – will never be found:
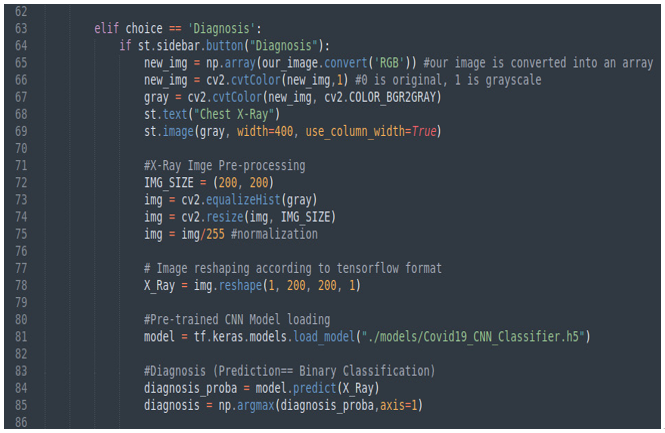
Figure 11.6: Line 81 indicates where we need to put the CNN model file
Finally, a rather big issue arises. When we try to upload Covid19_CNN_Classifier.h5, we discover that this operation is not possible since the file is larger than 25 MB and GitHub on the web only accepts files that are smaller than this size.
In the next section, we’ll learn how to manage this problem.