Configuring our environment
Actually, we already created a virtual environment at the beginning of the previous project, in Chapter 4, so we should be quite skilled at this task. Let’s start by creating an empty directory, which can be simply named covid. So, let’s write in our terminal the following instruction:
mkdir covid
Then, we can move inside the new directory just by typing the following:
cd covid
It’s now time to create our virtual environment. We know that this operation is very easy since we can use pipenv, as we already did in Chapter 4. So, once again, let’s write from our directory (it’s very important to be inside the covid directory):
pipenv shell
The virtual environment will be created quite quickly, and we should be at a stage like the one in the following figure:
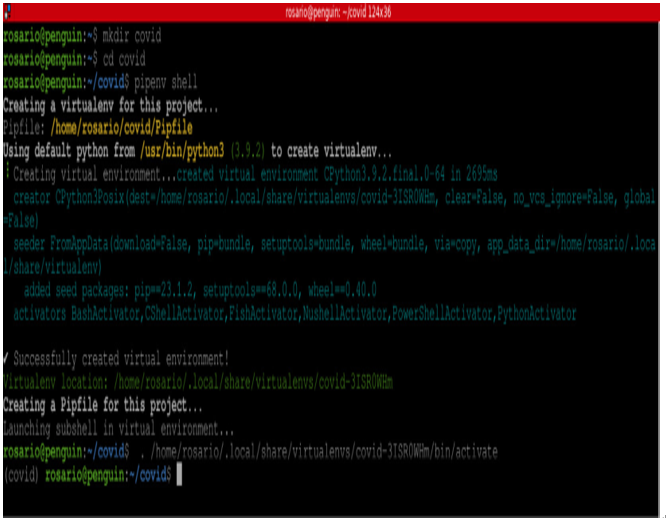
Figure 8.1: Virtual environment creation
As shown in Figure 8.1, a new directory named covid is created. Then, we enter this directory and, by writing pipenv shell, we create the virtual environment, assigning to it the name of the directory. The tool we are using to make the virtual environment (pipenv) provides a positive output (the text in green) and automatically opens the new virtual environment. In fact, at the beginning of the last line in the screenshot, the word covid between the parentheses indicates that we are inside the virtual environment.
At this point, the environment is ready but still empty, since we are still missing all the libraries we are going to use in our code. Let’s see what packages we need.
Installing and importing packages
Now that we are inside the covid directory and our virtual environment has been created, it’s time to install all the packages we are going to use in our web application.
We need five different libraries:
- Streamlit, our wonderful framework for web applications
- numpy, a library for advanced numeric calculations
- tensorflow, the package needed to manage neural networks
- Pillow, a library for image management
- opencv-python, the computer vision package
Let’s install everything by typing the following instructions one by one:
pipenv install streamlit numpy tensorflow Pillow opencv-python
This installation can take a little while. When it finishes, we should have something like this on our screen:
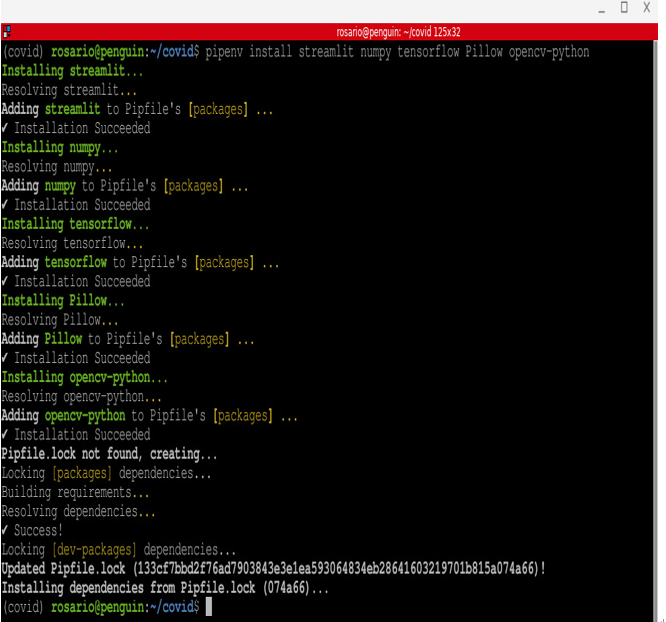
Figure 8.2: Package installation
We can now launch our editor, Sublime Text. You’ll see that in the covid directory, there are now the two famous files, Pipfile and Pipfile.lock, containing the configuration of our virtual environment with the installed libraries and the dependencies list:
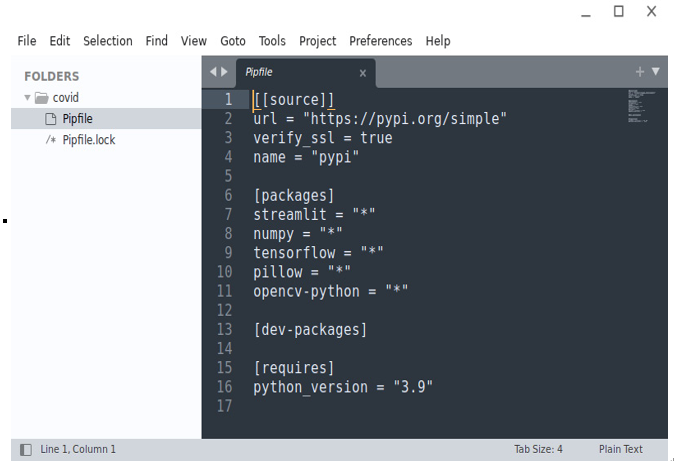
Figure 8.3: Pipfile
Now we can create a new file and call it, as usual, app.py, so let’s write the following:
touch app.py
Everything is finally ready to start coding.
Obviously, we have to start by importing the libraries, and this is very easy, as we can see in the following figure:
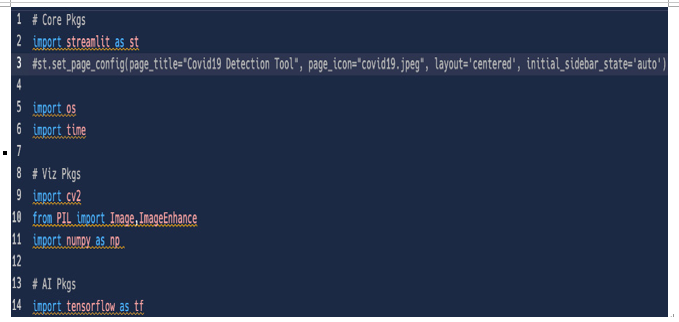
Figure 8.4: Importing the libraries
As for the previous web application, we need to create a main function. Let’s do it by adding some html code just to give a title to our app, and since we already imported Streamlit, as usual, let’s add as the first instruction, after the import streamlit as st line, the code for the page configuration (we just set the title, an icon – you can use any picture you want – and the initial sidebar state). The full code is as follows:
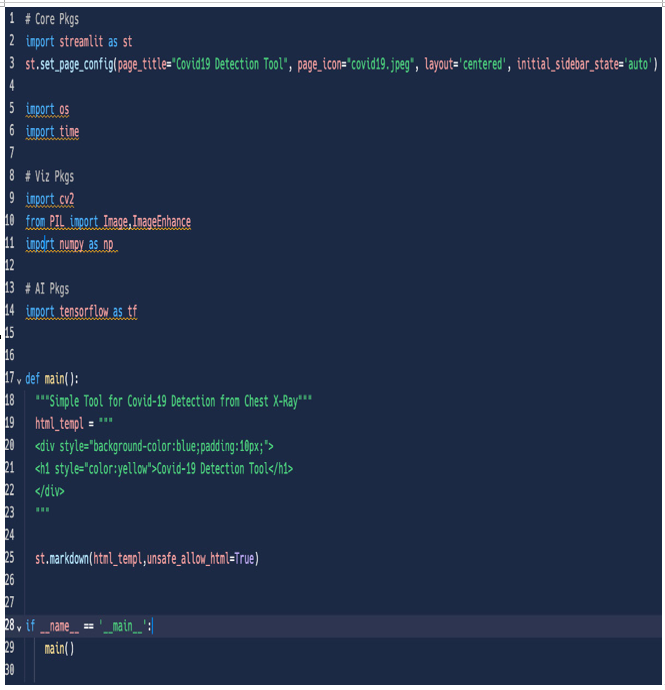
Figure 8.5: First app draft
At the moment, we’ve just imported the libraries and added very few lines of code, but the web app can be launched. Let’s do it by typing the following well-known instruction:
pipenv run streamlit run app.py
In the following figure, the result we get upon opening the browser on localhost port 8501 can be seen:

Figure 8.6: First launch of the app
No errors! We can continue to build the app skeleton now.
