
Building the menu and adding decorations
Now, we can add a selectbox in the sidebar, which will be the menu of the web application, and guidelines for its development. This menu will have three voices – Image Enhance, Diagnosis, and Disclaimer and Info – and it will be placed below the second if clause, the inner one, because it makes sense only if a valid image has already been uploaded. For sure, after the selectbox, we can place the three options (three if clauses) that will contain the code for each one of the menu voices.
We have already built up a menu in the same way in the NLP web application; the code is very easy:
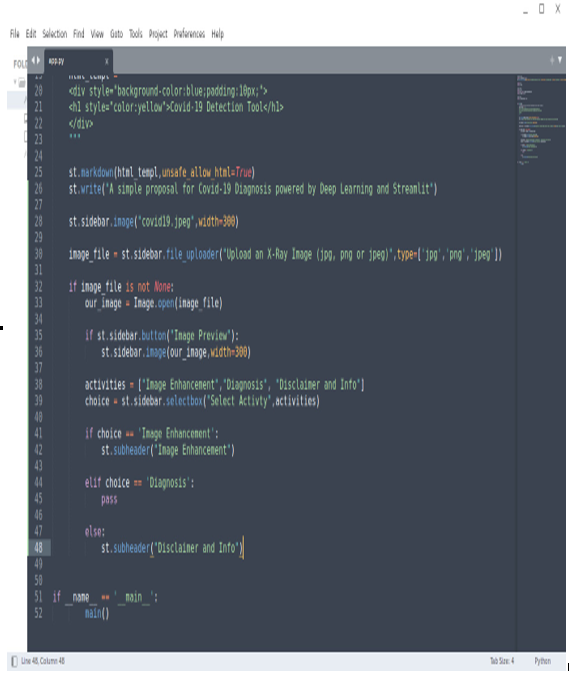
Figure 8.11: The menu (choice) and its voice sections
Here’s what we are doing:
- At line 38, we create a list containing all the menu voices
- Then, at line 39, we add a selectbox in the sidebar in order to visualize all the items contained in this list.
- After that, from line 41 up to line 48, we double-check which one of menu’s voices has been selected and just print the information on the screen – for example, st.subheader (Image Enhancement) or, in the case of Diagnosis, just pass.
The messages we print with the st.subheader or pass function (it’s just a function doing nothing) are simple placeholders and, in the next chapters, we are going to develop the code related to each one of them. Here’s how the app’s menu looks thus far:
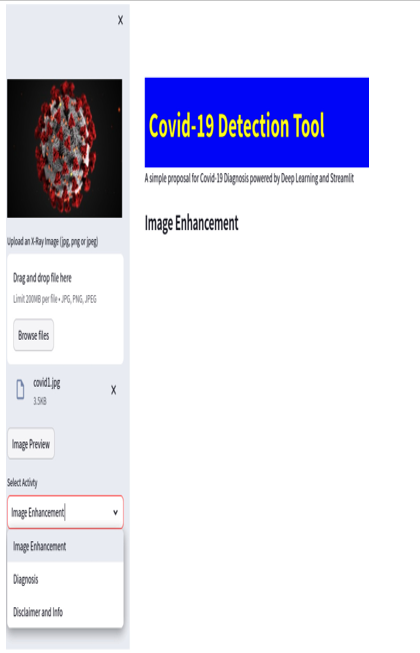
Figure 8.12: The menu in the browser
As a final decoration, before closing the chapter, we can add an About the Author button on the sidebar, showing in this way all the information about the author of the web application, the link to their website, their email, and so on. This is the code:
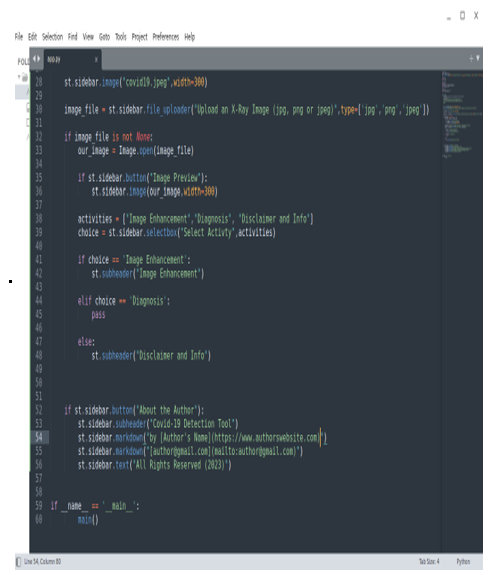
Figure 8.13: About the Author button code
This is the effect in the browser:
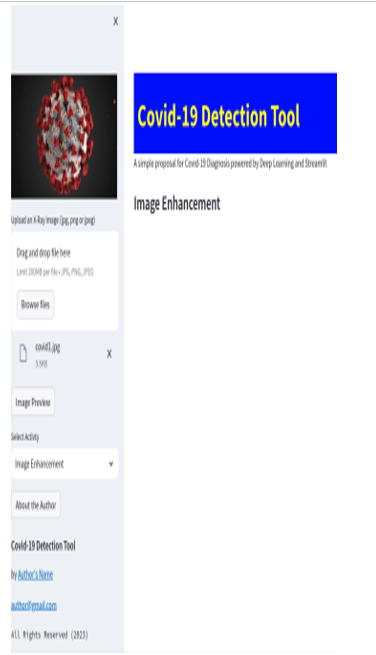
Figure 8.14: About the Author details
In this section, we created the menu for our new web application. Now, in the sidebar, there are several voices, and the user can clearly select what they want to do. This approach is very useful since it can be applied anytime we start working on a new app. On the left side, in the sidebar, we have a menu with the list of all the features available in the web application, and in the main part, we show the title and information and let the user insert data from their case.
Summary
In this chapter, we consolidated our knowledge about virtual environments and package installation. After that, as usual, we started from an empty file and developed the skeleton of our app.
First, we imported all the libraries and created a main function. We also created some nice decorations such as a title in html, a beautiful icon, and a very interesting image in the sidebar. We also discovered how to upload files by filtering their types and, once imported, we learned how to visualize those images thanks to the Pillow library.
Another important step was to build up the menu of our app with all its voices and, at the end, we created a button showing all the information about the author, with some linkable elements, such as their website and email address.
Starting from the next chapter, we will focus on developing the three voices of the menu, which,, at the moment, are just empty containers: Image Enhance, Diagnosis, and Disclaimer and Info.