
Adding the Image Enhancement section using the Pillow library
Among the libraries we imported at the beginning, there is Pillow. It contains a module named ImageEnhance that can actually take care of all the features related to any kind of image enhancement for us. This means that we can use the Contrast and Brightness methods already included in Pillow’s ImageEnhance module because all the functions we need, and many others, have been already implemented for us.
Pillow, or Python Imaging Library, is a very powerful library and it can do more than the things we are showing in this book. For this reason, we suggest taking a look at its official page on PyPI (https://pypi.org/project/Pillow/) and reading all the documentation contained there.

Figure 9.7: The Pillow page on PyPI
Let’s start with Contrast.
Contrast
As shown in Figure 9.8, managing Contrast with Pillow’s methods is really very simple:
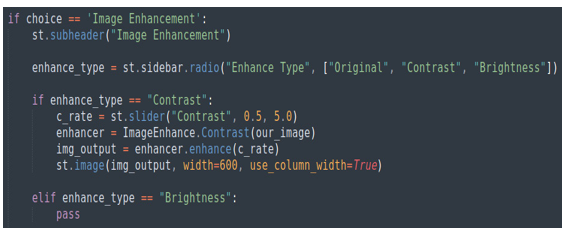
Figure 9.8: The Contrast feature
In the if case immediately after the subheader, we start by adding a slider. The values on this slider go from 0.5 to 5.0; you can play with this range to check the different behaviors.
After adding the slider, we need to instantiate an ImageEnhance.Contrast object using the image we opened previously (our_image) with file_uploader. Then, we apply the enhance method to this image with the value selected by using the slider.
Finally, the result is printed on the screen thanks to st.image, one of Streamlit’s classic widgets.
This is the result from the browser’s perspective:
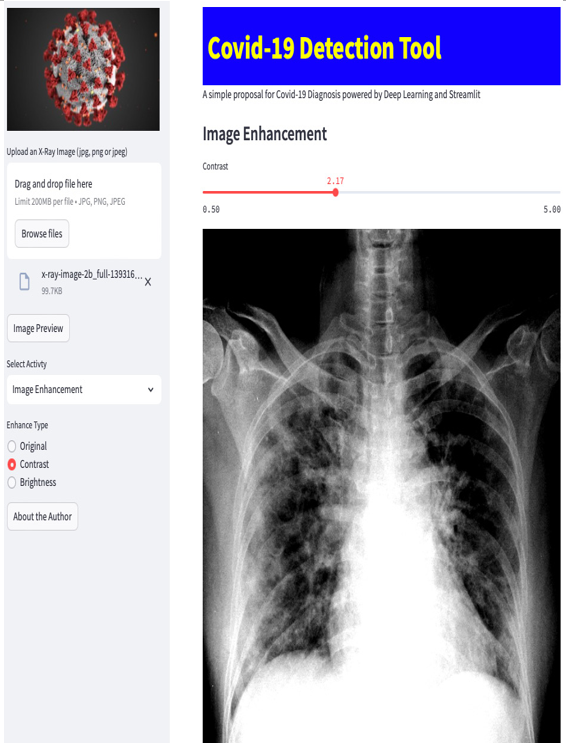
Figure 9.9: The Contrast feature in action
It gives a very nice result, and managing this kind of image enhancement with Pillow is really very easy.
As we just saw, Pillow contains the Contrast function out of the box. So, it’s quite obvious to imagine that it contains a Brightness function as well.
Brightness
In fact, the code we need to write for the Brightness feature is more or less the same as that for the Contrast feature. We can type the following:
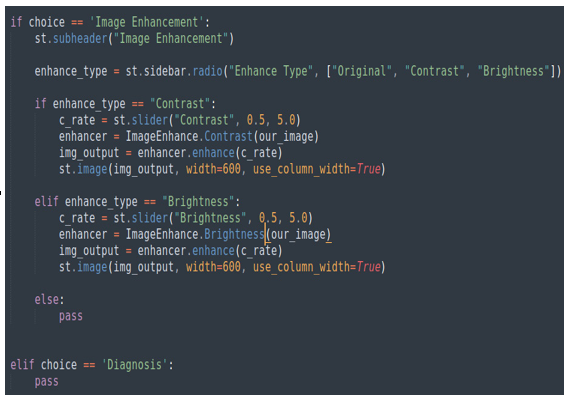
Figure 9.10: The Brightness feature
The preceding code is exactly the same as the code we wrote for Contrast, but this time, we are using the ImageEnhance.Brightness method instead of the ImageEnhance.Contrast method.
So, once again, we set a value for the brightness using a slider, create an enhancer object from the image opened thanks to file_uploader, apply the brightness to this image, and print the result on the screen.
This is the result in our web application:
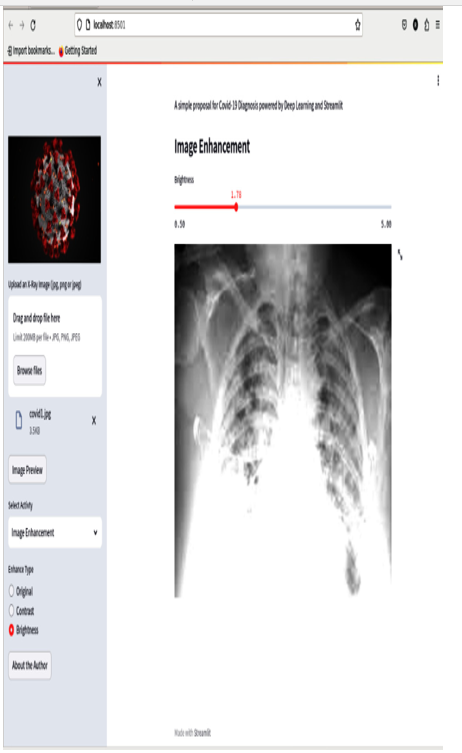
Figure 9.11: The Brightness feature in action
In both cases, Brightness and Contrast, you can change the strength of the effect by selecting different values using the slider, and if you don’t like the outcome, you can always change the range that we set as 0.5 to 5.0.
The final option we can select using the radio button is Original.